This episode is the second in a series called “Great Escapes”, covering stories of RNZAF ejections from aircraft that have saved lives in emergency situations.
In this episode Pete Lindsay tells the story of his incredible ejection from a BAC167 Strikemaster Mk. 88, NZ6367. He was on a cross-country exercise while training with No. 14 Squadron RNZAF on the 3rd of July 1985. While attempting to beat up the farmhouse of his wingman’s parents, he struck high tension power cables strung across a valley. The aircraft was put instantly into a spin from around 100 feet. Pete ejected a split second before the jet struck a hillside and exploded. This is one heck of a survival story.
The music used in this episode is Hazy After Hours, from Mixkit
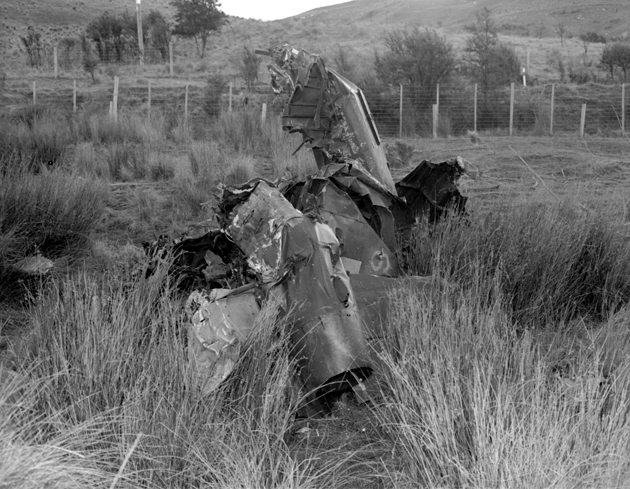
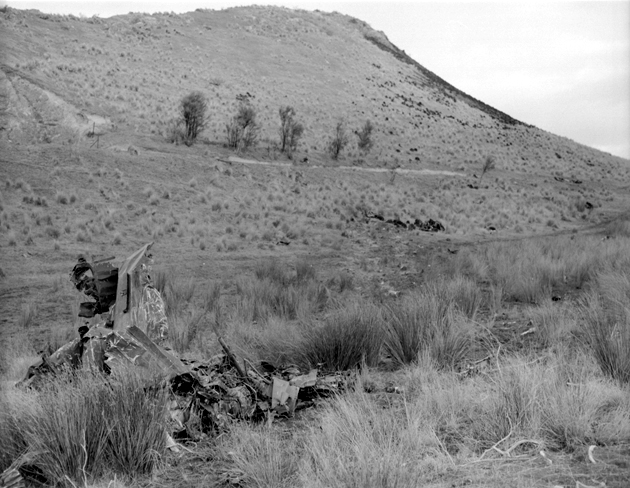
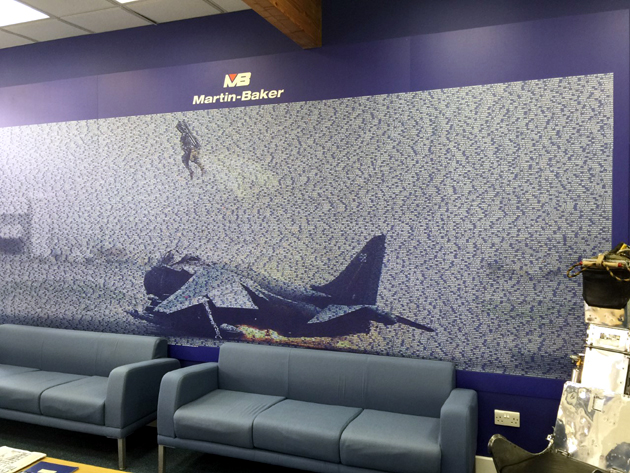
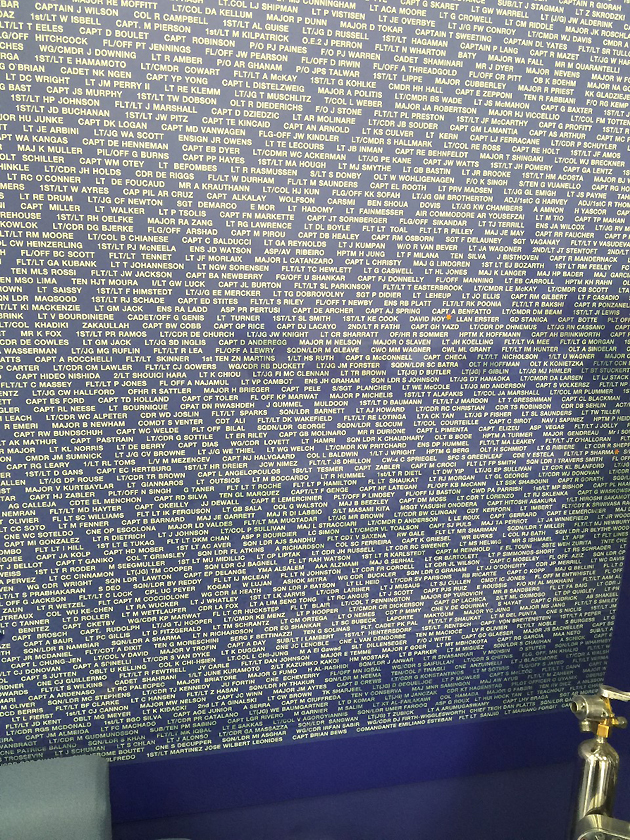
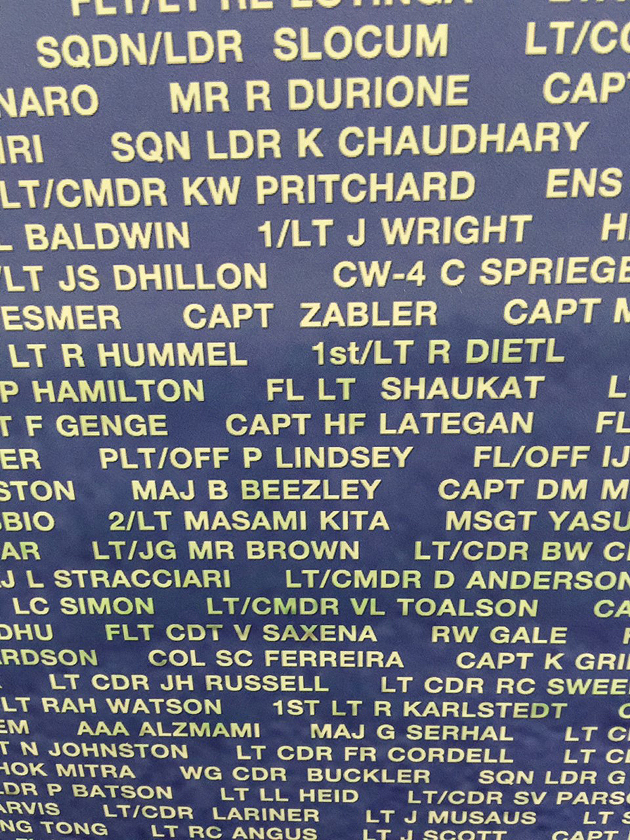
Air to air view of No. 14 Squadron Strikemaster NZ6367, flown by Pilot Officer DP Barham flight over Cape Reinga, during exercise Falcons Roost 17 at Kaitaia Airport. This photo was taken on 26/04/1983, two years before this very aircraft was involved in Pete Lindsay’s incident. Air Force Museum of New Zealand photo OhG878-83Wreckage of No. 14 Squadron Strikemaster NZ6367, after a wire strike caused it to crash near Waiau, North Canterbury. Pilot Officer Peter Lindsay, ejected and survived. This was the first Strikemaster to be lost by the RNZAF. Air Force Museum of New Zealand photo Wg-G679-22-85Wreckage of No. 14 Squadron Strikemaster NZ6367, after a wire strike caused it to crash near Waiau, North Canterbury. Pilot Officer Peter Lindsay, ejected and survived. This was the first Strikemaster to be lost by the RNZAF. Air Force Museum of New Zealand photo WgG679-23-85The wreckage of Pete Lindsay’s Strikemaster NZ6367 after it was recovered to the No. 14 Squadron RNZAF hangar at Ohakea, Another Strikemaster sits to the left, and a preserved Vampire on the right. Photo kindly supplied by Terry Austin.The photo montage wall at the Martin Baker factory in London. It represents the ejection by RAF pilot Martin Pert from a Hawker Harrier on the 14th of May 2009at Kandahar, Peter Lindsay photo. The photo montage wall at the Martin Baker factory in London. The names are all people who successfully ejected using Martin Baker seats. Peter Lindsay photo. A close up pf Pilot Officer Peter Lindsay’s name on the photo montage wall at the Martin Baker factory in London. Peter Lindsay photo.
Below: Photos from Strikemaster owner Charles Davis which show the canopy detonation cord, thanks to Charles for the photos.
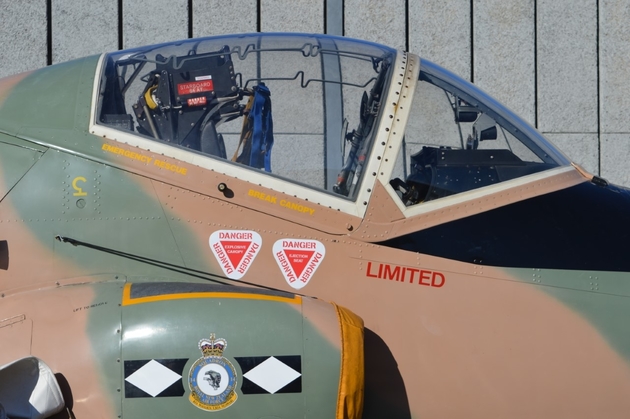
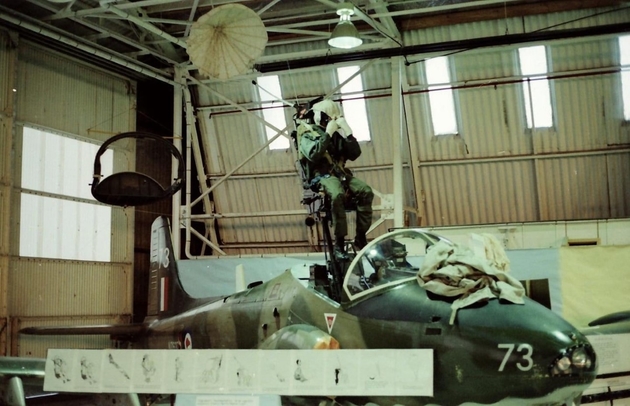
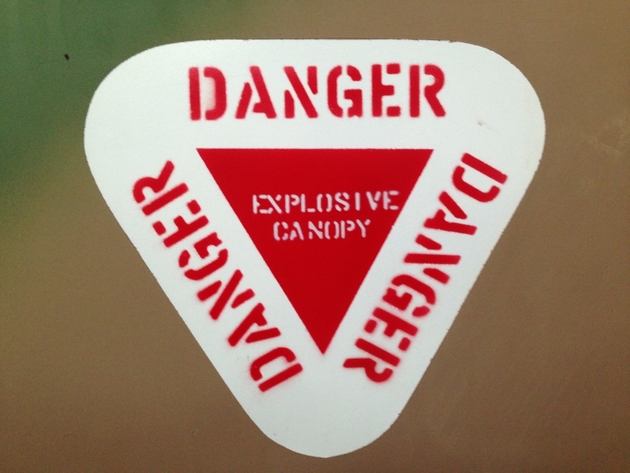
A set-up for a public display in an RNZAF Base Ohakea hangar of how an ejection seat works. Note this demonstrates the earlier method of the canopy being released before the seat rocket motor fires. Had Pete have been flying a Strikemaster with this set-up he would have undoubtedly not have had time to eject. Photo from Charles Davis.The warning symbol on each side of the Strikemaster for those aircraft with the canopy detonation cord. Charles Davis photo.
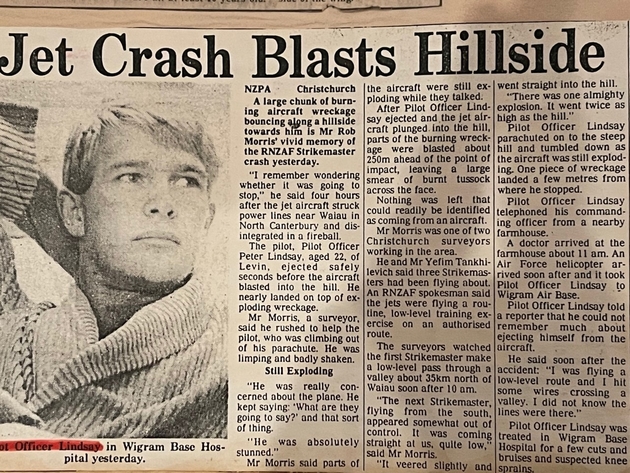
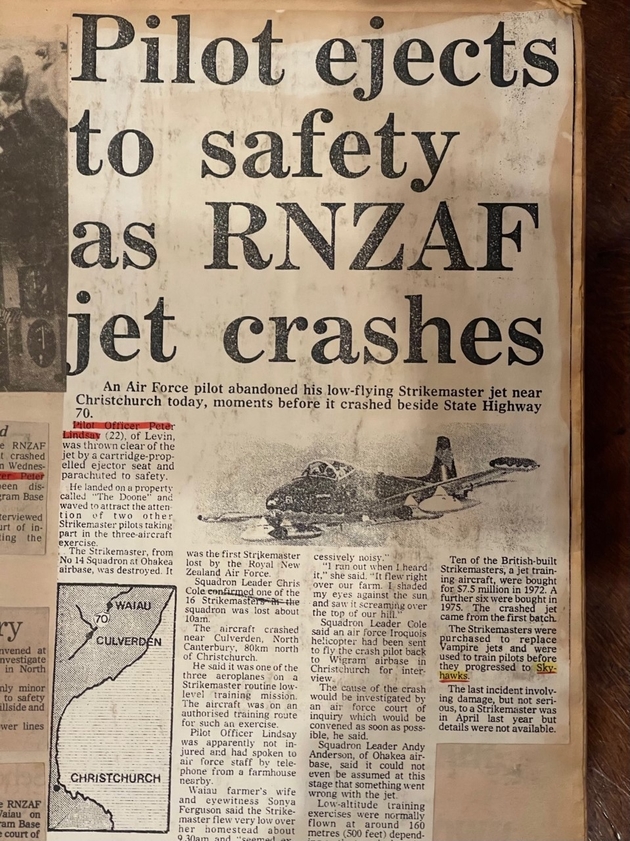
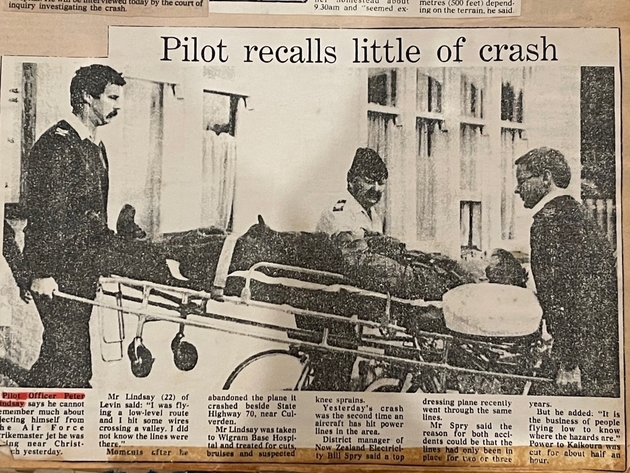
Below: Three newspaper articles from Charles Davis’s scrapbook on Pete Lindsay’s crash and ejection. Thanks to Charles for these.
8 comments to WONZ 247 – Great Escapes 2 – Peter Lindsay
This is gold thanks Peter and Dave and brings back many memories. I was an advisor to the Court of Inquiry (along with several others in close succesion) which involved a couple of days picking over the crash scene ahead of the formal Court interviews. I was in Air Staff HQ when the RNZAF PR guy called asking what I knew about a Strikemaster crash which at that stage was nothing. There was then a comedy of events trying to get through to Ohakea as, amongst other things, the crash coincided with a fire drill at Freyberg House resulting in the Defence phone network being unattended. I think the Deputy Chief of Staff ended up feeding 2 cent coins into a phone box on Featherston Street in an attempt to contact the Squadron.
This event was bracketed by a Skyhawk landing rollover in Townsville and a Sioux write off at Hobsonville along with a near mid-air collision between a B727 and a C130. Miraculously – and this event is as close as it could possibly get – no lives were lost. Busy times…..
I was working as a press photographer in Napier in early 1985 when a Wise Owl exercise was held at the airport there. Pete Lindsay was piloting a Strikemaster there, and participated in a local school visit, where one of the kids asked him if he had ever used an ejection seat – “No” he replied, “and I hope I never do!”. Six months later he did!


[…] • Great Escapes 2 – Pete Lindsay […]
[…] • Great Escapes 2 – Pete Lindsay […]
[…] • Great Escapes 2 – Pete Lindsay […]
Great podcast, an amazing story! Played squash with Pete in Dubai and worked with him for a couple of years. A true gent and a real character.
Thanks Andy, I am glad you enjoyed the show.
This is gold thanks Peter and Dave and brings back many memories. I was an advisor to the Court of Inquiry (along with several others in close succesion) which involved a couple of days picking over the crash scene ahead of the formal Court interviews. I was in Air Staff HQ when the RNZAF PR guy called asking what I knew about a Strikemaster crash which at that stage was nothing. There was then a comedy of events trying to get through to Ohakea as, amongst other things, the crash coincided with a fire drill at Freyberg House resulting in the Defence phone network being unattended. I think the Deputy Chief of Staff ended up feeding 2 cent coins into a phone box on Featherston Street in an attempt to contact the Squadron.
This event was bracketed by a Skyhawk landing rollover in Townsville and a Sioux write off at Hobsonville along with a near mid-air collision between a B727 and a C130. Miraculously – and this event is as close as it could possibly get – no lives were lost. Busy times…..
Thanks for those memories, Graham. I am glad you enjoyed this episode.
I was working as a press photographer in Napier in early 1985 when a Wise Owl exercise was held at the airport there. Pete Lindsay was piloting a Strikemaster there, and participated in a local school visit, where one of the kids asked him if he had ever used an ejection seat – “No” he replied, “and I hope I never do!”. Six months later he did!